Refinishing your hardwood floors is one of the highest-return projects a homeowner can take on. Done right, it can add thousands to your home’s value and transform a worn, dull space into something that genuinely impresses. But the top floor refinishing tips most articles give you barely scratch the surface. The real difference between a lasting, professional-looking result and a finish that peels, blotches, or shows sanding marks comes down to the details most guides skip entirely. This article covers ten practical, experience-backed tips to help you get it right from start to finish.
Table of Contents
- Key takeaways
- Planning your refinishing project the right way
- 1. Follow the correct sanding grit sequence
- 2. Never stop the drum sander on the floor
- 3. Blend edges with an orbital sander
- 4. Use proper lighting to catch uneven sanding
- 5. Perform a three-stage dust clean before finishing
- 6. Apply stain evenly and consider water popping
- 7. Choose your finish based on your real-life schedule
- 8. Control humidity and temperature during finish application
- 9. Use a dustless sanding system
- 10. Protect your floors and schedule regular maintenance
- Comparing refinishing methods side by side
- My honest take after years of working with hardwood floors
- Ready to transform your hardwood floors?
- FAQ
Key takeaways
| Point | Details |
|---|---|
| Assess before you sand | Check your wear layer thickness and finish type before choosing between screen-and-recoat or full sanding. |
| Follow grit sequence exactly | Skipping sanding grits causes visible scratches that no amount of finish coat will hide. |
| Dust control changes everything | Three-stage cleaning after sanding prevents microscopic debris from ruining finish adhesion. |
| Match your finish to your timeline | Water-based finishes dry faster; oil-based finishes take longer but deliver warmer color tones. |
| Maintain after refinishing | Felt pads, humidity control, and periodic recoating extend the life of your refinished floor by years. |
Planning your refinishing project the right way
Before you rent a sander or open a can of finish, you need to evaluate your floor honestly. This planning stage is where most DIY floor refinishing projects go wrong, and it is also where professional refinishers earn their fees.
Start with the wear layer. Solid hardwood floors can only be sanded a limited number of times, and remaining wear layer thickness determines whether sanding is even possible. You need at least 6 mm for multiple refinishing cycles. Under 2 mm, and sanding typically is not an option.
Next, identify what finish is already on your floor. Polyurethane, shellac, and lacquer each respond differently to new coats. If you apply a water-based finish over an oil-based one without proper preparation, you may get adhesion failure within weeks.
Then assess the damage level honestly:
- Surface damage (light scratches, dullness, fading): Screen-and-recoat is often enough
- Moderate damage (deeper scratches, uneven sheen): Full sanding may be needed
- Structural damage (cupping, buckling, pet stains that penetrate the wood): Full sanding or board replacement required
The method you choose also depends on whether you want a color change. Color change requires full sanding down to bare wood. Screen-and-recoat only refreshes the existing finish layer.
Pro Tip: Draw a small grid of pencil marks across the floor before sanding. After your first pass, every area where pencil marks remain signals a low spot your sander has not reached yet. Keep going until every mark is gone.
| Method | Best for | Cost range |
|---|---|---|
| Screen-and-recoat | Dull finish, light wear | $1–$3 per sq ft |
| Full sanding and refinish | Deep scratches, stains, color change | $3–$8 per sq ft |
| Board replacement | Structural damage, rot | Add-on per board |
1. Follow the correct sanding grit sequence
The single biggest sanding mistake homeowners make is skipping grits. A proper sequence runs 36 to 60 to 80 to 100 to 120, with each grit removing the scratch pattern left by the previous one. If you jump from 36 to 80, you will leave deep grooves that show clearly under the finished coat. There is no shortcut here.
Each grit pass should take roughly the same amount of time as the last. If you rush through the finer grits, you are essentially undoing the precision work of the earlier passes.
2. Never stop the drum sander on the floor
A drum sander is not something you can pause mid-room. Stopping the drum while it is in contact with the floor creates a divot or burn mark that is nearly impossible to correct without aggressive resanding. Always keep the machine moving in a steady, overlapping pattern.
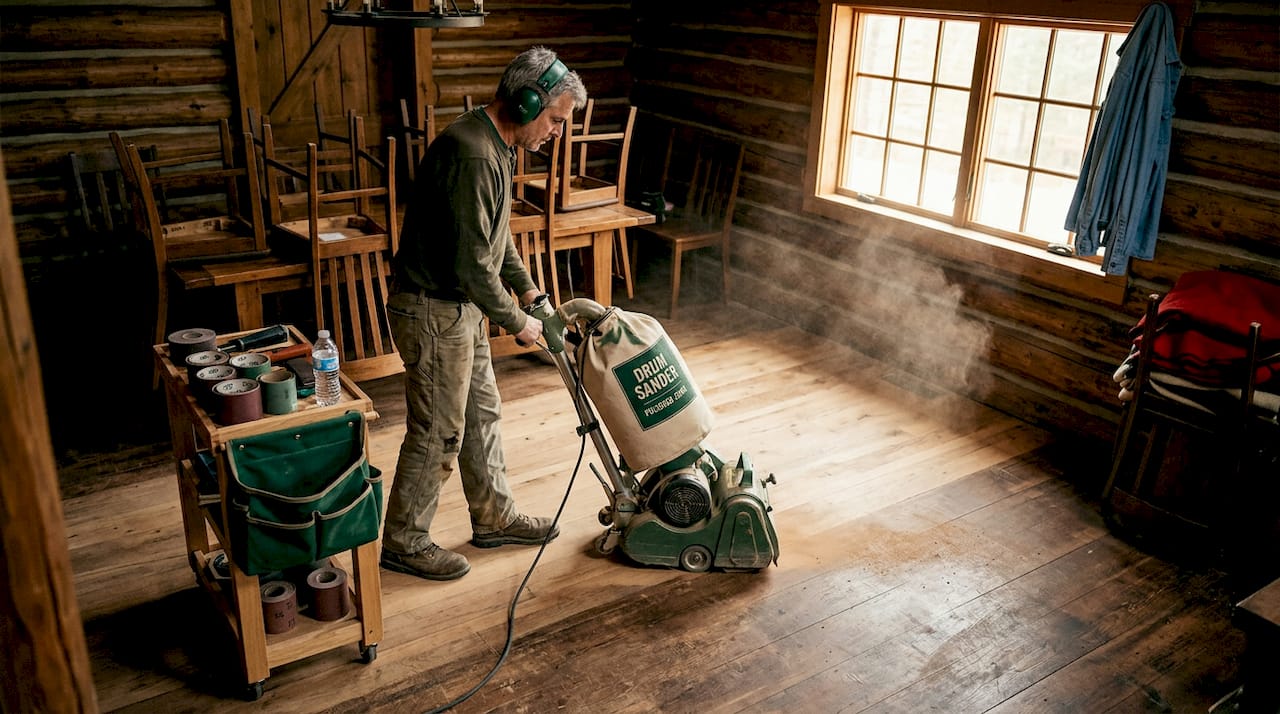
Lower the drum as you start moving forward, and raise it before you stop. Practice this rhythm a few times on an inconspicuous area before working the main floor.
3. Blend edges with an orbital sander
The drum sander covers your main field, but it cannot reach within six inches of the wall. That is where the edge sander comes in. The problem most DIYers run into is that edge sanding and drum sanding produce different scratch patterns that show up as a visible “halo” ring once finish is applied.
The fix is to use a random orbital sander at your final grit level to blend the transition zone between the two sanded areas. It takes an extra fifteen minutes per room and makes a dramatic difference in the final look.
4. Use proper lighting to catch uneven sanding
Your overhead lights will fool you. Rake a bright work light at a low angle across the floor after each sanding pass and you will see ridges, swirl marks, and missed spots that look completely invisible under normal lighting.
This is how professional finishers catch defects before finish goes down, when they can still fix them. Once you apply a finish coat, those imperfections are locked in permanently.
5. Perform a three-stage dust clean before finishing
Sanding creates microscopic dust that settles back onto the floor even after vacuuming. If you apply finish over that dust, you get grain raise, peeling, and a surface that feels rough to the touch.
Pros use a strict three-stage cleaning process: industrial vacuum extraction first, then a dry tack cloth wipe, then a mineral spirits wipe for oil-based finishes. Every stage removes a different particle size.
The floor must be treated as a clean room once sanding is done. One person walking through with street shoes can deposit enough debris to ruin your finish coat. Seal off the room, change into clean socks, and do not let anyone in until the finish is dry.
6. Apply stain evenly and consider water popping
If you are changing the floor color, stain application technique matters as much as stain color selection. Apply stain too thick or unevenly and you get blotchy patches where the wood absorbed differently.
Water popping is a professional technique that raises the wood grain by lightly misting the sanded floor with water before staining. It opens the wood grain uniformly, which means even stain absorption and a consistent color across the whole floor. Let the floor dry completely, typically two to four hours, before applying stain.
Pro Tip: Test your stain color on a hidden area, such as inside a closet, before committing to the main room. Stain colors look dramatically different on bare wood compared to the small chip in a hardware store catalog.
7. Choose your finish based on your real-life schedule
The water-based versus oil-based finish debate usually comes down to personal preference, but your actual schedule should guide the decision.
Water-based finishes dry fast, smell less, and allow multiple coats in a single day. Oil-based finishes take much longer between coats and produce stronger fumes, but they cure to a harder, warmer-toned surface over time.
Key considerations when choosing:
- Water-based: Dry to the touch in 2 hours, full cure in 2 weeks, minimal odor, slight amber tint
- Oil-based: Dry in 8 hours, full cure in 30 days, strong fumes, rich amber warmth
- Moisture-cured urethane: Fastest curing, most durable, but requires professional application due to fume hazards
8. Control humidity and temperature during finish application
Finish application is not just about the floor. Ambient conditions during application and drying directly affect the final result. Humidity above 70% slows drying dramatically. Temperature below 55°F can prevent proper film formation.
Aim for 60 to 70 degrees Fahrenheit and 40 to 60% relative humidity during application and the first 24 hours of drying. If you are refinishing in summer with no air conditioning, wait for a cooler week. A finish applied in bad conditions will not cure the way the manufacturer intends, no matter how well you applied it.
9. Use a dustless sanding system
Conventional floor sanders generate enormous amounts of airborne dust that settle back onto the floor, coat your lungs, and create a cleanup nightmare that lasts days. Modern dustless sanding systems capture up to 98% of sanding dust at the source, piping it directly into a containment unit.
The premium for dustless equipment typically runs $0.50 to $1.50 per square foot above standard sanding rental rates. That is money well spent. You get better indoor air quality, less contamination risk for your finish coats, and a dramatically easier cleanup.
Pro Tip: Even with a dustless system, wear an N95 respirator during sanding. The 2% of dust that escapes containment still adds up over a full day of work, and fine hardwood dust is classified as a respiratory irritant.
10. Protect your floors and schedule regular maintenance
The refinishing job is only as good as the care that follows it. Without basic maintenance, even the best professional finish starts degrading within a year or two.
Key long-term maintenance habits include:
- Apply felt pads to all chair and furniture legs before moving anything back onto the floor
- Use area rugs in high-traffic zones but choose rug pads that breathe rather than trap moisture
- Control indoor humidity between 35 and 55% year-round to prevent wood movement and cracking
- Clean spills immediately with a dry cloth rather than a wet mop
- Schedule a screen and recoat every three to five years to maintain the finish before it wears through to bare wood
A screen-and-recoat done at the right time costs a fraction of full refinishing and adds years to your floor’s life. It is the single best piece of floor refinishing advice most homeowners never act on until it is too late.
Comparing refinishing methods side by side
Not every floor needs the same treatment. Use this comparison to match the right method to your floor’s actual condition and your budget.
| Method | Cost per sq ft | Timeline | Disruption level | Lifespan added |
|---|---|---|---|---|
| Screen-and-recoat | $1–$3 | 1 day | Very low | 3–5 years |
| Full sanding and refinish | $4–$9 | 3–5 days | High | 10–15 years |
| Board replacement + refinish | Add-on per board | 5+ days | Very high | 15+ years |
Screen-and-recoat is best when your finish is dull but structurally sound. Full sanding is the right call when you have deep scratches, pet stains, or a color change in mind. Board replacement is reserved for floors with structural damage that sanding cannot fix. Matching the method to the condition is what separates effective floor refinishing advice from generic recommendations.
My honest take after years of working with hardwood floors
I have watched homeowners make the same mistakes repeatedly, and the one that surprises me most is how many people underestimate preparation. They spend good money on quality finish products and then rush through the cleaning stage before application. The finish goes down over microscopic dust, and within six months they are calling someone to redo the whole job.
Patience genuinely is the skill. Not patience in a vague, motivational sense. I mean literally waiting the full two to four hours between coats when the can says to. Letting the floor acclimate to room temperature before you sand. Waiting for the water pop to fully dry before staining.
The other thing most beginners get wrong is finish selection. I see people choose oil-based finish because it sounds tougher, then apply it in a poorly ventilated space in August. The fumes, the extended drying time, the heat affecting cure rates. Water-based technology has improved significantly over the last decade. For most residential floors, it delivers a tough, beautiful result with a fraction of the disruption.
Refinishing a floor well is not complicated. It is just sequential and unforgiving of shortcuts. Get the prep right, follow the grit sequence, clean thoroughly before you apply finish, and respect the curing times. Those four things alone put you ahead of most first-time refinishers.
— Jim
Ready to transform your hardwood floors?
If these steps feel like a lot to manage on your own, that is completely understandable. Professional refinishing is not just about having the right equipment. It is about the judgment calls that come from doing hundreds of floors: knowing when a floor actually needs full sanding versus a recoat, catching the adhesion issues before they become problems, and applying finish in conditions that produce a lasting result.
Polishedjemmfloor has been doing exactly that across the tri-state area since 2014. Whether your floor needs a one-day screen and recoat or a full sand-down and refinish, the team at Polished JEMM brings the same attention to every project. Explore the hardwood floor refinishing guide to see the full process and understand what a professional project involves from assessment through final coat. You can also review refinishing services and pricing to find the right fit for your floor’s condition and your timeline.
FAQ
What is the difference between screen-and-recoat and full sanding?
Screen-and-recoat scuffs the existing finish and adds a fresh topcoat, making it ideal for dull but structurally sound floors. Full sanding removes all finish and a thin wood layer, which is necessary for deep scratches, stains, or color changes.
How do I know if my floor can be sanded again?
Check the remaining wear layer thickness. Floors with at least 6 mm of wear layer above the tongue can typically handle additional sanding, while floors under 2 mm usually cannot.
How long should I wait before walking on a refinished floor?
Light foot traffic in socks is generally safe after 24 hours. Furniture should stay off for at least 48 to 72 hours. Full cure for most finishes takes two weeks for water-based and up to 30 days for oil-based products.
Can I refinish hardwood floors myself?
Yes, but the margin for error is small. Common DIY mistakes like stopping the drum sander mid-floor, skipping sanding grits, or applying finish over dusty surfaces produce defects that are expensive to correct.
How often should hardwood floors be refinished?
Most hardwood floors benefit from a screen-and-recoat every three to five years and a full refinish every ten to fifteen years, depending on foot traffic and how well the floor is maintained between treatments.