Your hardwood floors looked stunning when they were first installed. Now they catch the light all wrong, showing a network of fine scratches and a dull, lifeless finish that no amount of mopping seems to fix. The good news is that you don’t need a week of chaos, clouds of sawdust, or harsh chemical fumes to bring them back. Floor screening, an abrasion method that refreshes just the surface finish without removing wood, is the smarter, greener path to floors that shine again. This guide walks you through exactly what screening involves, what you’ll need, and every step of the process so you can move forward with confidence.
Table of Contents
- What is floor screening and is it right for your home?
- Gather your tools and materials: What you’ll need to screen hardwood floors
- Step-by-step floor screening process
- Troubleshooting and common mistakes in floor screening
- How to check your results and plan for long-lasting protection
- Why eco-friendly floor screening is the future in New Jersey homes
- Get professional results: The Polished Jemm can help
- Frequently asked questions
Key Takeaways
| Point | Details |
|---|---|
| Eco-friendly refresh | Floor screening lets you revive hardwood without harsh chemicals or heavy sanding. |
| Quick, low-disruption process | The entire screen and recoat can often be done in just one day. |
| Right candidate matters | Screening works best for floors with light wear and no deep damage. |
| Proper prep is crucial | Most problems are avoided by careful cleaning and setup before screening. |
| Maintenance extends floor life | A simple care routine after screening keeps your floors shining longer. |
What is floor screening and is it right for your home?
Floor screening means using a circular abrasive pad (called a screen) to scuff up the existing finish layer on your hardwood floor. You are not removing wood. You are creating a slightly rough surface so that a fresh coat of finish bonds tightly to the old one. Think of it like lightly sanding a painted wall before adding a second coat of paint. The result is a renewed surface that looks dramatically better than before.
This approach is completely different from full refinishing, which uses heavy drum sanders to strip away the old finish and a thin layer of actual wood before starting fresh. Full refinishing is the right call when your floors have deep gouges, staining that has soaked into the wood, or boards that have been refinished so many times the wood is dangerously thin. For most New Jersey homes with floors that just look tired and dull, floor screening is an eco-friendly alternative to full sanding, ideal for minimally damaged floors.
Recoating means applying a new topcoat of finish, which is exactly what comes after screening. The two steps together form the “screen and recoat” service you’ll often see listed by floor care professionals. You can also explore the full range of refinishing benefits to understand when a deeper approach makes more sense.
Is your floor a good candidate for screening? Here are the signs to look for:
- Surface scratches that haven’t cut through the finish into the wood
- General dullness or cloudiness across the floor
- Light scuff marks from furniture or pet nails
- Finish that looks worn and thin but is still intact
- No deep gouges, cupping, or warping in the boards
Comparison: Screening vs. refinishing vs. recoating alone
| Method | Removes wood? | Dust level | Dry time | Best for |
|---|---|---|---|---|
| Screen and recoat | No | Very low | 4 to 24 hours | Light wear, dullness |
| Full refinishing | Yes | High | 24 to 72 hours | Deep scratches, stains |
| Recoat only | No | None | 4 to 24 hours | Very minimal wear |
If you answer yes to most of the bullet points above, screening is likely your best option. Check the screen and recoat FAQs for even more specific guidance on whether your floor qualifies.
Gather your tools and materials: What you’ll need to screen hardwood floors
Once you’ve determined screening is right, it’s time to understand what you’ll need for a smooth, safe project. The equipment list is shorter than you might expect, but choosing the right items, especially eco-friendly finishes, matters a great deal for both the quality of your results and the health of your home.
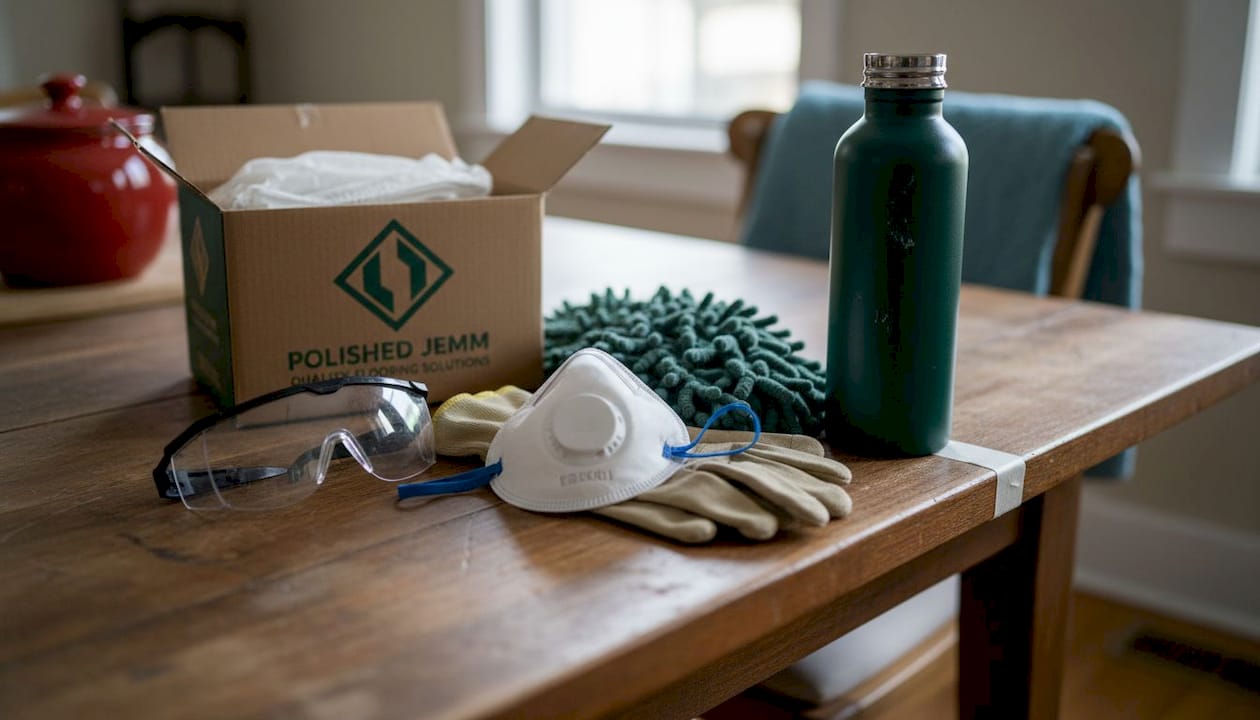
Essential tools and materials:
- Buffer or pole sander with 120-grit screen pads
- Vacuum with fine-dust attachment
- Tack cloths or microfiber mop for final dust removal
- Low-VOC (volatile organic compound) waterborne polyurethane finish
- Applicator pad or lambswool applicator
- Painter’s tape and plastic sheeting to seal vents
- Respirator mask rated for organic vapors
- Safety glasses and knee pads
- Bucket and clean cloths for washing the floor beforehand
Using the right abrasives and low-VOC finishes supports an eco-friendly workflow that keeps indoor air clean and reduces the environmental impact of the project. Low-VOC waterborne finishes dry faster, smell much milder, and clean up with water rather than harsh solvents.
Cost and time expectations:
| Approach | Typical cost range | Time required |
|---|---|---|
| DIY screen and recoat | $150 to $400 (materials + rental) | 1 full day |
| Professional service | $1 to $3 per square foot | 1 day, no effort from you |
Pro Tip: Renting a professional buffer for a single day is almost always better than buying one. Floor buffer rentals run about $40 to $60 per day at most home improvement stores, and you get access to a commercial-grade machine without the storage headache. Just make sure the rental shop shows you how to use it before you leave.
The right protective gear is non-negotiable. Even with low-dust screening pads, fine particles will become airborne. A respirator, not a basic dust mask, protects your lungs throughout the process.
Step-by-step floor screening process
With your tools in hand, you’re ready for the hands-on part. Let’s walk through each step in detail so nothing gets missed.
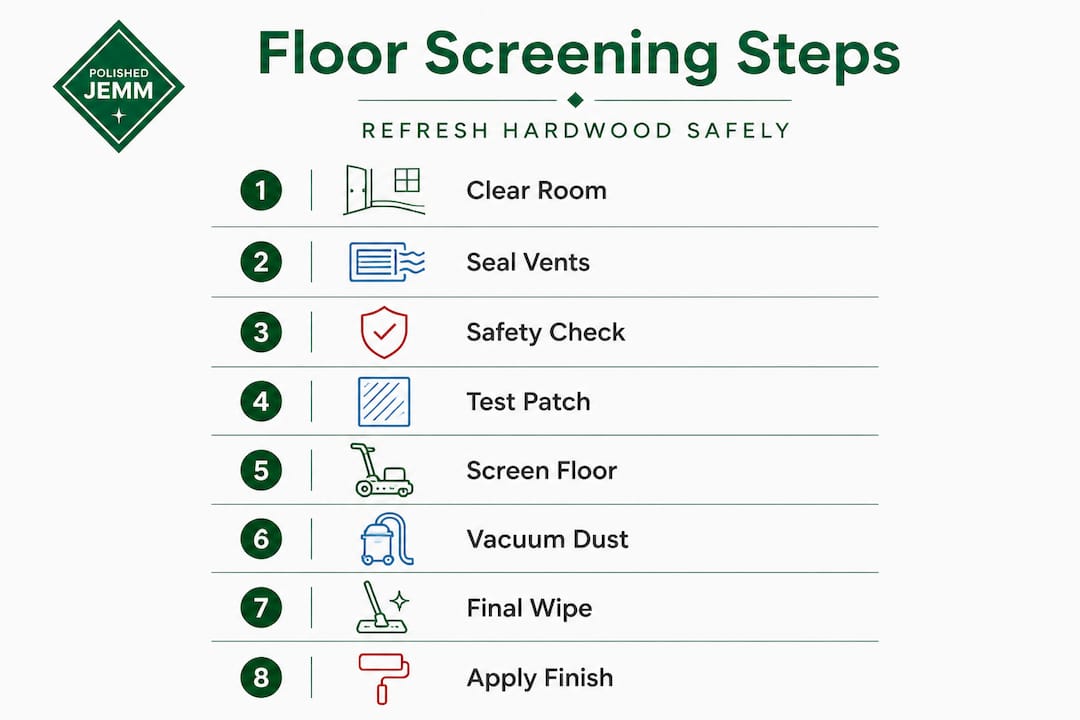
1. Clear and clean the room thoroughly.
Move all furniture out completely. Sweep, then damp-mop the floor to remove every trace of grit and debris. Any particles left on the surface will scratch the finish during screening. Allow the floor to dry completely before moving on.
2. Tape off vents and doorways.
Use painter’s tape and plastic sheeting to seal all HVAC vents. This prevents fine abrasive dust from spreading through your ductwork and into other rooms. Tape off doorways with plastic sheeting as well.
3. Do a safety check before you start.
Open windows for ventilation, even when using low-VOC products. Send children, pets, and anyone with respiratory sensitivities out of the home during the screening and coating stages. Put on your respirator, safety glasses, and knee pads.
4. Test a small, hidden area first.
Screen a two-foot patch in a closet or corner to confirm the existing finish responds well. Look for consistent, even abrasion with no peeling or lifting. If the finish peels, screening won’t work and the floor needs full refinishing instead.
5. Screen the entire floor.
Work the buffer in smooth, overlapping passes along the grain of the wood. Avoid stopping in one spot, as that creates swirl marks. Keep the buffer moving at a steady, comfortable pace.
6. Vacuum all dust immediately.
Use a fine-dust vacuum attachment and work your way out from the farthest corner to the exit. Get into the edges and corners by hand with a tack cloth.
7. Final wipe-down with a tack cloth or microfiber mop.
This step is critical. Even invisible dust particles will ruin your finish coat if they’re not removed. Go over the entire floor slowly.
8. Apply the first coat of finish.
Use an applicator pad in long, smooth strokes following the wood grain. Work from the farthest corner toward the exit. Apply thin, even coats. Thick coats take longer to dry and can leave streaks.
9. Allow adequate dry time before a second coat.
Most waterborne finishes need two to four hours between coats. Read your specific product instructions. A typical screen and recoat can be completed in a single day, minimizing disruption to your household.
10. Apply the second coat and allow full cure.
Two coats are standard for most screen and recoat projects. Allow the final coat to dry for at least four to six hours before light foot traffic, and 24 hours before moving furniture back in.
“Proper preparation and following each step in order is what separates a floor that looks great for years from one that starts peeling within months.”
You can find additional guidance on prepping for floor screening and browse more floor care tips to stay informed as you plan your project.
Pro Tip: Always follow the finish manufacturer’s instructions exactly, especially for dry times. Humidity levels in New Jersey homes vary significantly between seasons, and high humidity can extend drying time by hours. Check the weather before you start.
Troubleshooting and common mistakes in floor screening
Even with good instructions, mistakes can happen. Addressing them quickly makes all the difference between a floor you’re proud of and one you wish you’d left to the professionals.
Common issues and how to handle them:
- Swirl marks or uneven abrasion: Usually caused by holding the buffer too long in one spot or pressing too hard. If you see swirl marks after screening, re-screen the affected area with a fresh pad using lighter pressure and continuous movement.
- Dust control problems: If fine dust is spreading beyond the work area, check that all vents are sealed and add a box fan with a filter at an open window to create negative air pressure in the room.
- Sticky or slow-drying finish: This almost always points to high humidity or applying too thick a coat. Run a dehumidifier, increase ventilation, and wait longer before adding a second coat.
- Patchy or uneven finish appearance: This can happen when the screening was inconsistent. Let the current coat dry fully, do a very light screen pass over the patchy areas with a fine-grit pad, clean thoroughly, and reapply finish to those spots.
- Finish peeling at edges: Edge areas are often hand-screened with edge pads, and it’s easy to miss spots or apply uneven pressure there. Take extra time on edges and corners during both screening and finish application.
“Rushing the prep work creates problems that show up only after the finish dries. Slow down at the cleaning and dust-removal stages and you save time overall.” This insight applies directly to refinishing essentials as well, since careful preparation is the foundation of any floor project.
Proper preparation and clean-up are key to a flawless result, regardless of whether you’re doing a quick screen and recoat or a more involved refinishing project.
How to check your results and plan for long-lasting protection
Once your floor is dry, there are a few final checks and habits to ensure a beautiful, lasting finish that holds up for years.
What success looks like:
- The finish appears uniform and smooth across the entire surface
- No visible swirl marks, bubbles, or streaks under normal lighting
- The wood grain shows clearly without cloudiness
- The floor has a consistent sheen (matte, satin, or gloss depending on your product)
- Edge areas match the center of the floor in appearance
If you spot a minor bubble or small rough patch, very light sanding with a 220-grit sanding pad and a thin touch-up coat of finish can correct it without redoing the whole floor.
For long-term care, regular maintenance can extend floor life and postpone the need for costly refinishing by years. Here’s what a smart maintenance routine looks like:
- Sweep or vacuum with a soft-bristle attachment two to three times per week
- Use only pH-neutral, hardwood-safe cleaners, never vinegar or steam
- Place felt pads under all furniture legs, and replace them when they wear out
- Use area rugs and entrance mats to reduce direct wear at high-traffic zones
- Keep indoor humidity between 35% and 55% year-round to prevent wood movement
- Plan a new screen and recoat every three to five years, depending on traffic
Placing mats at every exterior door is one of the simplest and most effective protective habits. Grit tracked in from outside acts like sandpaper under every footstep and is a leading cause of finish wear over time. These habits, combined with periodic professional long-term floor care services, add years to the life of your floors without any major intervention.
Why eco-friendly floor screening is the future in New Jersey homes
We’ve been working on hardwood floors across the tri-state area since 2014, and the shift in what homeowners ask for has been real and consistent. A few years ago, the main question was simply “how soon can you get it done?” Now, the questions we hear most often are “how low is the VOC count?” and “is this safe for my kids and dog?”
That shift reflects something important. New Jersey homeowners are not just buying a service. They are making decisions about their indoor air quality, the health of their families, and the environmental impact of work done in their homes. Low-VOC waterborne finishes that meet or exceed current environmental standards are no longer a niche upgrade. They’re quickly becoming the expectation.
Here’s the part that surprises people: eco-friendly products have actually improved the results we deliver. Waterborne finishes dry faster, allowing us to complete more coats in a single day. They don’t yellow over time the way oil-based finishes can. The floor looks cleaner and stays cleaner longer. Choosing green is not a compromise.
We’ve also found that the minimal-disruption model matters tremendously to busy families. The ability to do a full screen and recoat in a single day, with the family back on the floor by evening, is only possible with the right products and the right process. Smart, eco-forward strategies aren’t just good for the environment. They’re genuinely better for the homeowner experience from start to finish. We believe this is the direction the entire industry is moving, and we are proud to already be there.
Get professional results: The Polished Jemm can help
If you’ve read through this guide and feel confident in the process, that’s exactly what we hoped for. But you may also be thinking that getting this right the first time, without renting equipment, managing dust, or worrying about uneven finish coats, sounds pretty good too.
At Polished JEMM Floor Care, our professional screen and recoat service is designed to give you a flawless, eco-friendly result in a single day with zero stress on your part. We use low-VOC finishes, professional-grade equipment, and a process refined over a decade of work in New Jersey and the surrounding tri-state area. For floors with more serious wear, our refinishing services restore hardwood all the way down to beautiful bare wood and back again. You can also read our complete refinishing guide to keep learning. Reach out to us today for a quote and find out how quickly your floors can look stunning again.
Frequently asked questions
How long does the floor screening process take from start to finish?
Most professional screen and recoat projects are completed in a single day, including all prep work and drying time between coats. DIY projects on the same timeline are possible but depend heavily on preparation speed and humidity levels.
Does floor screening create lots of dust or odor?
Screening produces far less dust than full sanding, and using low-VOC finishes keeps odors minimal and indoor air quality safe throughout the project. Proper ventilation and sealed vents keep any dust contained to the work area.
Can I walk on the floors the same day after screening and recoating?
Light foot traffic is typically safe after four to six hours, but you should wait at least 24 hours before replacing rugs or moving heavy furniture back. Rushing this step is one of the most common causes of early finish damage.
What’s the main difference between screening and refinishing?
Screening abrades only the surface finish so a new topcoat can bond to it, while refinishing uses heavy equipment to remove all the finish and some actual wood to address deep scratches, staining, or severe wear. Screening is faster, less invasive, and far less disruptive.