Your hardwood floors looked stunning the day they were installed, but somewhere between muddy boots, dragged chairs, and the occasional spilled glass of water, that luster started to fade. For suburban New Jersey homeowners, hardwood floors are one of the most valuable features in the house, both aesthetically and financially. The good news is that most of the damage that steals that shine is completely preventable. With a structured care workflow and a few smart habits, you can keep your floors looking their best year after year without spending a fortune on repairs.
Table of Contents
- Assessing your floor’s needs and workflow essentials
- Step-by-step floor care workflow
- Troubleshooting and avoiding common mistakes
- Verifying results and knowing when to seek professional help
- Why shortcuts often cost more: The truth about hardwood floor care
- Ready for professional support? Explore Polished Jemm resources
- Frequently asked questions
Key Takeaways
| Point | Details |
|---|---|
| Routine protects value | Regular cleaning and pad replacement help keep your hardwood floors beautiful and prevent expensive damage. |
| Prevent scratches early | Using pads, mats, and a no-shoes policy keeps floors looking new and minimizes marks. |
| Verify and adjust | Review your floor’s condition every few months to ensure your routine is working and prevent small issues from becoming major repairs. |
| Know when to call experts | Professional services may be needed for deep scratches, dullness, or restoration that goes beyond daily care. |
Assessing your floor’s needs and workflow essentials
Now that you understand the importance, let’s start by assessing your current floor and the basics you’ll need.
Before you can build a care routine, you need to know what you’re working with. Walk through your home and pay close attention to where foot traffic is heaviest. Entryways, hallways, kitchens, and living rooms take the most punishment. These zones will need more frequent attention than a guest bedroom or formal dining room that rarely sees use.
Common signs your floors need extra attention:
- Visible scratches or scuff marks, especially near furniture legs
- A dull or cloudy appearance where the finish has worn thin
- Small gaps between boards, which can signal changes in humidity
- Gritty or sticky residue that doesn’t come up with a dry mop
- Discoloration or dark spots near doorways or pet areas
Once you’ve identified the trouble spots, gather your essentials. A good workflow starts with the right tools. You’ll need a dry microfiber mop, a vacuum with a hardwood floor setting (no beater bar), a pH-neutral hardwood floor cleaner, felt furniture pads, and quality entry mats for every exterior door.
| Workflow essential | Purpose | How often to use |
|---|---|---|
| Microfiber mop | Removes dust and fine debris | Daily or every other day |
| Hardwood vacuum | Picks up grit without scratching | 2 to 3 times per week |
| pH-neutral cleaner | Deep cleans without damaging finish | Weekly or monthly |
| Felt furniture pads | Prevents scratches from furniture | Replace every 6 months |
| Entry mats | Traps dirt and moisture at the door | Check and clean weekly |
Pro Tip: Check your floor care tips library for product recommendations specific to your floor’s finish type, whether it’s oil-based polyurethane, water-based polyurethane, or a wax finish.
One of the most overlooked protective measures is also one of the simplest. According to Good Housekeeping, felt pads under furniture should be replaced every 6 months, and pairing that habit with entry mats, trimmed pet nails, and a no-shoes policy indoors dramatically reduces the most common causes of surface damage. Most homeowners skip the pad replacement step entirely, and that’s when the scratching starts.
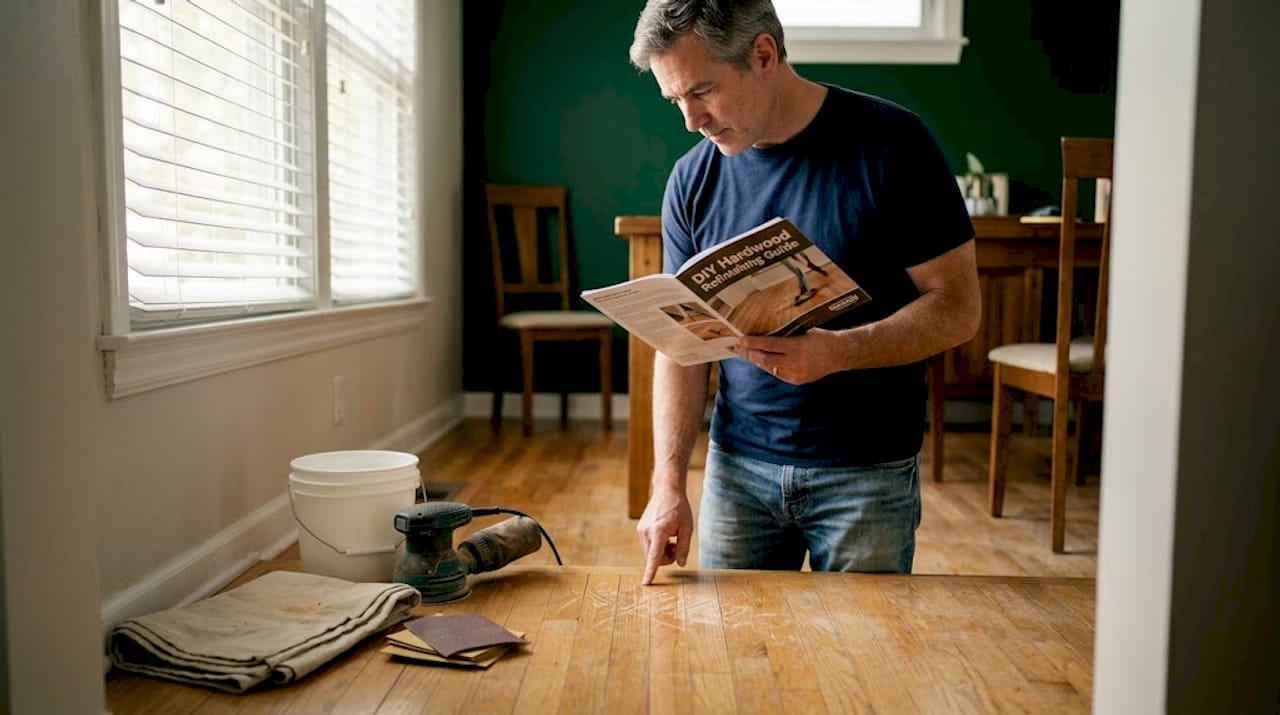
If your floors already show significant wear, a refinishing guide can help you understand whether you need a full refinish or a lighter touch like a screen and recoat.
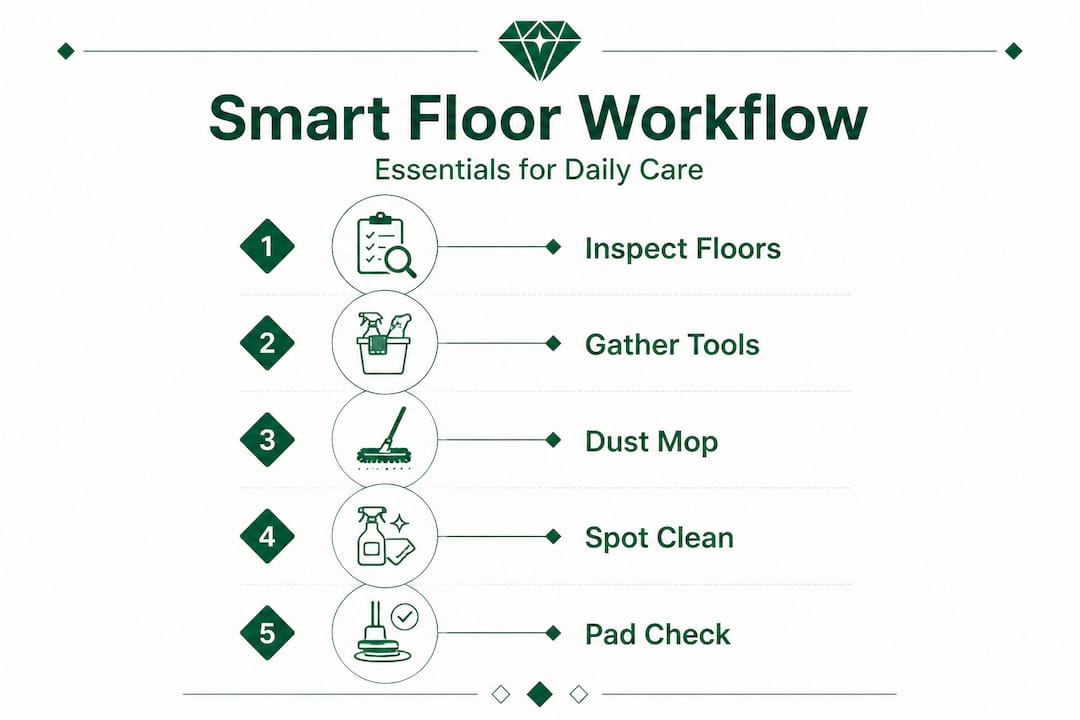
Step-by-step floor care workflow
With your essentials ready, follow this workflow to maintain your floors week after week.
Consistency is the single biggest factor in how well your floors hold up over time. A routine doesn’t have to be complicated. It just has to happen regularly. Here’s a practical workflow you can actually stick to.
Daily and weekly floor care steps:
- Dry mop or dust daily in high-traffic zones. Fine grit and dust act like sandpaper underfoot, grinding away the finish with every step. A quick pass with a microfiber mop takes less than five minutes.
- Vacuum two to three times per week using a hardwood-safe setting. Pay extra attention to edges and corners where debris collects.
- Spot clean spills immediately. Use a barely damp cloth to blot, never rub, any liquid. Moisture is hardwood’s biggest enemy.
- Mop with a pH-neutral cleaner once a week in high-traffic areas and once a month in lower-traffic rooms. Wring the mop until it’s almost dry before it touches the floor.
- Check furniture pads monthly. If they look compressed, worn, or have debris stuck to them, replace them. Worn pads are worse than no pads at all because they trap grit against the wood.
- Inspect entry mats every week. Shake them out, wash them regularly, and make sure they’re actually catching what comes in from outside.
- Trim pet nails every two to three weeks. Long nails leave tiny gouges in the finish that accumulate over time into visible scratches.
| Task | DIY routine | Neglect result |
|---|---|---|
| Daily dust mopping | Finish stays intact | Grit scratches the surface |
| Immediate spill cleanup | No water damage | Staining and warping |
| Pad replacement every 6 months | Furniture slides safely | Deep scratches and gouges |
| Monthly deep clean | Consistent shine | Residue buildup and dullness |
| No-shoes policy | Less grit and debris | Accelerated finish wear |
Pro Tip: Review our cleaning and buffing tips to understand when buffing can restore shine between full refinishing cycles. It’s a cost-effective middle step that many homeowners don’t know about.
The felt pads and protective habits mentioned above aren’t optional extras. They’re the foundation of scratch prevention. Think of them as the first line of defense before any cleaning product even enters the picture.
One more thing worth noting: seasonal humidity changes in New Jersey can cause hardwood boards to expand and contract. Running a humidifier in winter and an air conditioner or dehumidifier in summer keeps indoor humidity between 35% and 55%, which is the sweet spot for hardwood stability.
Troubleshooting and avoiding common mistakes
Once you’ve got your routine down, here’s how to handle problems and steer clear of pitfalls.
Even with a solid routine, issues come up. The key is responding quickly and correctly. Here’s how to handle the most common problems without making them worse.
Water spills and moisture damage: Blot immediately with a clean, dry cloth. Never let water sit. If you notice a dark stain or slight warping after a spill, place a dry towel over the area and let it absorb moisture for several hours. Persistent dark stains may require sanding and spot refinishing.
Scratches and scuff marks: Light surface scratches can often be buffed out with a hardwood-specific touch-up kit or a small amount of matching wood stain applied with a cotton swab. Deeper scratches that cut through the finish into the wood itself are harder to conceal and usually require professional attention.
Dull patches: Dullness is usually caused by one of two things: finish wear or product buildup. If you’ve been using a cleaner that leaves a residue, that film builds up over time and blocks the natural sheen. Strip the buildup with a hardwood-safe cleaner and see if the shine returns. If it doesn’t, the finish may be worn through.
Products and practices to avoid:
- Steam mops: The heat and moisture penetrate the finish and can warp or buckle boards
- Vinegar or lemon juice: These are acidic and break down the finish over time
- All-purpose household cleaners: Most contain chemicals that dull or damage hardwood finishes
- Wet mopping: Even a slightly too-wet mop can cause swelling and cupping over time
- Abrasive scrubbing pads: These scratch the finish on contact
“The most expensive hardwood floor mistake isn’t one big accident. It’s dozens of small, avoidable habits repeated week after week until the damage becomes irreversible.”
Understanding what to avoid is just as important as knowing what to do. Many homeowners unknowingly accelerate wear by using the wrong products. If you’re unsure whether your floors have a wax finish that requires special handling, our wax removal questions page covers everything you need to know before applying any cleaner or treatment.
Pro Tip: Keep a small emergency kit under your sink: a microfiber cloth, a hardwood touch-up marker in your floor’s color, and a bottle of pH-neutral cleaner. When something happens, you’ll respond in seconds instead of scrambling.
The protective habits of using entry mats and enforcing a no-shoes policy are especially critical in New Jersey’s climate, where salt, sand, and road grit get tracked in during winter months. That combination is particularly abrasive on hardwood finishes.
Verifying results and knowing when to seek professional help
After applying these steps and tips, you’ll want to check your results and decide on next steps for your floors.
A good care routine should produce visible results within a few weeks. Here’s what to look for when evaluating whether your efforts are working.
Signs your routine is working:
- The floor has a consistent sheen across all areas, not just in low-traffic zones
- Scratches are not multiplying or deepening
- The surface feels smooth underfoot, not gritty or sticky
- Boards are lying flat without gaps, cupping, or buckling
- Spills and dirt clean up easily without leaving residue
Warning signs that routine care isn’t enough:
- Deep scratches that go through the finish and into the wood grain
- Boards that have started to cup (edges higher than the center) or crown (center higher than edges)
- Large areas of dullness that don’t respond to cleaning
- Discoloration that covers more than a small spot
- Visible wear patterns in high-traffic areas where the finish is completely gone
Statistic to know: Hardwood floors that receive regular professional maintenance, including periodic buffing and recoating, can last 25 to 100 years. Floors that are neglected often need full replacement within 10 to 15 years.
When routine care stops being enough, professional services fill the gap. A screen and recoat (also called a buff and recoat) is a lighter process that scuffs the existing finish and applies a fresh coat on top. It’s ideal for floors that are dull or lightly scratched but structurally sound. Full refinishing involves sanding down to bare wood and rebuilding the finish from scratch. It’s the right call for deep scratches, stains, or significant wear.
Understanding the refinishing benefits helps you make an informed decision about which service your floors actually need. And if you’re new to the process, refinishing basics walks you through what to expect from start to finish.
The protective measures you put in place now, felt pads, mats, a no-shoes policy, directly influence how long you can go between professional services. Floors that are well-maintained between visits cost less to restore and respond better to treatment.
Why shortcuts often cost more: The truth about hardwood floor care
Most guides will tell you what to do. Here’s what they don’t tell you about why so many homeowners still end up with damaged floors despite having good intentions.
The most common misconception we see is that hardwood floor care is something you do when you notice a problem. Homeowners spot a dull patch or a scratch and then scramble to fix it. But hardwood care is not reactive. It’s preventive. By the time you can see the damage clearly, it’s already been accumulating for months.
Another misconception is that more product means better results. We’ve seen floors where homeowners applied layer after layer of shine-enhancing sprays, thinking they were protecting the wood. What they actually did was build up a thick, cloudy residue that blocked the finish and required professional stripping to remove. Less is almost always more when it comes to hardwood care products.
The real cost of shortcuts shows up in the long run. A homeowner who skips pad replacements for two years might save fifteen minutes of effort. But when those worn pads grind deep scratches into the finish, the repair cost is easily several hundred dollars for a professional buff and recoat, or several thousand for a full refinish. The math isn’t close.
What we’ve seen since 2014, working with floors across the tri-state area, is that the homes with the most beautiful hardwood are almost never the ones with the newest floors. They’re the ones where the owners built a simple, consistent routine and stuck to it. A five-minute daily dust mop and a twice-yearly pad replacement aren’t glamorous habits, but they’re the ones that keep floors looking like they were just installed.
Investing in professional expertise at the right moment, before damage becomes severe, is also far more cost-effective than waiting until a full replacement is on the table. The discipline of regular care, paired with timely professional intervention, is the real secret to floors that last generations.
Ready for professional support? Explore Polished Jemm resources
If you want support or a true transformation, here’s where to get started.
Your care routine lays the foundation, but sometimes floors need more than a mop and a good cleaner can offer. Whether you’re dealing with years of accumulated wear or you simply want to restore that just-refinished look, Polished JEMM Floor Care has been helping New Jersey homeowners do exactly that since 2014.
Start with our detailed floor refinishing guide to understand your options and what each service involves. When you’re ready to take the next step, explore our refinishing services to find the right solution for your floors. From a one-day screen and recoat to a full refinish using eco-friendly products, we bring craftsmanship and care to every job. Your floors deserve more than a quick fix, and we’re here to deliver lasting results.
Frequently asked questions
How often should I replace furniture pads on hardwood floors?
Replace felt pads under furniture every 6 months to prevent scratching and wear. Worn or compressed pads can trap grit and cause more damage than no pads at all.
What’s the safest way to clean everyday dirt and dust from hardwood floors?
Use a dry microfiber mop or a vacuum with a hardwood floor setting, avoiding any water or harsh cleaners for daily maintenance. Dry dust removal is the single most protective daily habit you can build.
Can I use generic household cleaners on my hardwood floors?
Avoid all-purpose cleaners and vinegar entirely, as both can break down your floor’s finish over time. Stick to hardwood-specific products with a neutral pH to clean safely without causing damage.
What can I do if my hardwood floors are already scratched or dull?
Minor scratches may be concealed with touch-up products designed for hardwood, but extensive damage typically requires professional buffing or refinishing to restore the surface properly.