Refinishing hardwood floors looks deceptively simple on home improvement shows, but the reality is far more demanding. Many homeowners in New Jersey and Pennsylvania discover this the hard way after attempting a DIY project, only to end up with uneven color, bubbling finish, or visible sanding marks. Refinishing is a precise, multi-step process that requires the right equipment, materials, and timing to restore your floors to their original beauty and extend their lifespan by decades. This guide walks you through exactly what the process involves, how long it takes, and what can go wrong if you cut corners.
Table of Contents
- What is the hardwood floor refinishing process?
- Comparing refinishing to other flooring solutions
- Timeline: How long does floor refinishing take?
- Common challenges and expert tips for a smooth refinishing job
- Why the right refinishing process matters more than you think
- Get expert help with your hardwood floor refinishing
- Frequently asked questions
Key Takeaways
| Point | Details |
|---|---|
| Refinishing is multi-step | Proper refinishing includes prep, sanding, possible staining, sealing, and curing for a long-lasting finish. |
| Method matters | Choosing between refinishing, screen & recoat, or replacing depends on the floor’s condition and your goals. |
| Timeline awareness | Typical refinishing projects take 3–5 days including drying between each step. |
| Preparation is vital | Good prep—like dust control, repairs, and right material selection—prevents common problems and extends floor life. |
| Expertise pays off | Hiring trained professionals ensures safe, attractive, and durable results with less hassle for homeowners. |
What is the hardwood floor refinishing process?
Refinishing hardwood floors means stripping the old surface down to bare or near-bare wood, correcting any surface flaws, applying color if desired, and sealing the wood with a durable protective finish. It is not just a cleaning or a quick coat of polyurethane. Think of it like repainting a car: the prep work determines 80% of the final result.
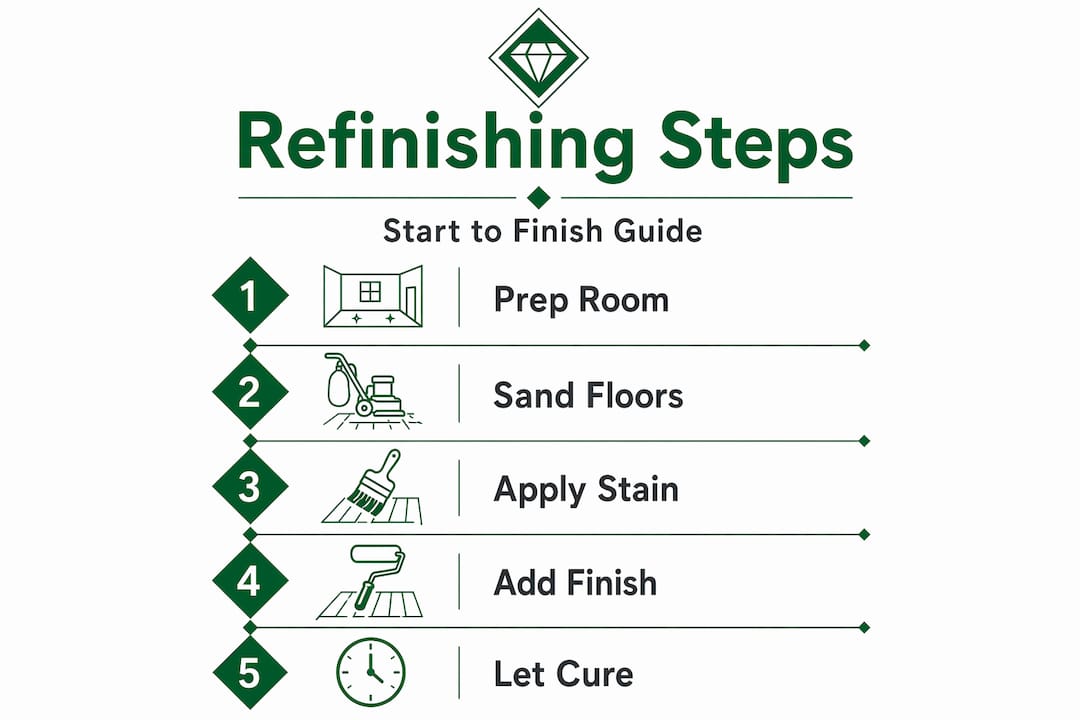
As professional refinishing services outline, the work follows a clear sequence that cannot be rushed or reordered without consequences. Here is how the process unfolds step by step:
-
Inspection and preparation. Before anything else, a professional assesses the floor for damaged boards, protruding nails, squeaks, and any areas too thin to sand again. Furniture is removed, vents are sealed to contain dust, and the perimeter is prepped. Skipping this step means discovering problems mid-project when they are much harder to fix.
-
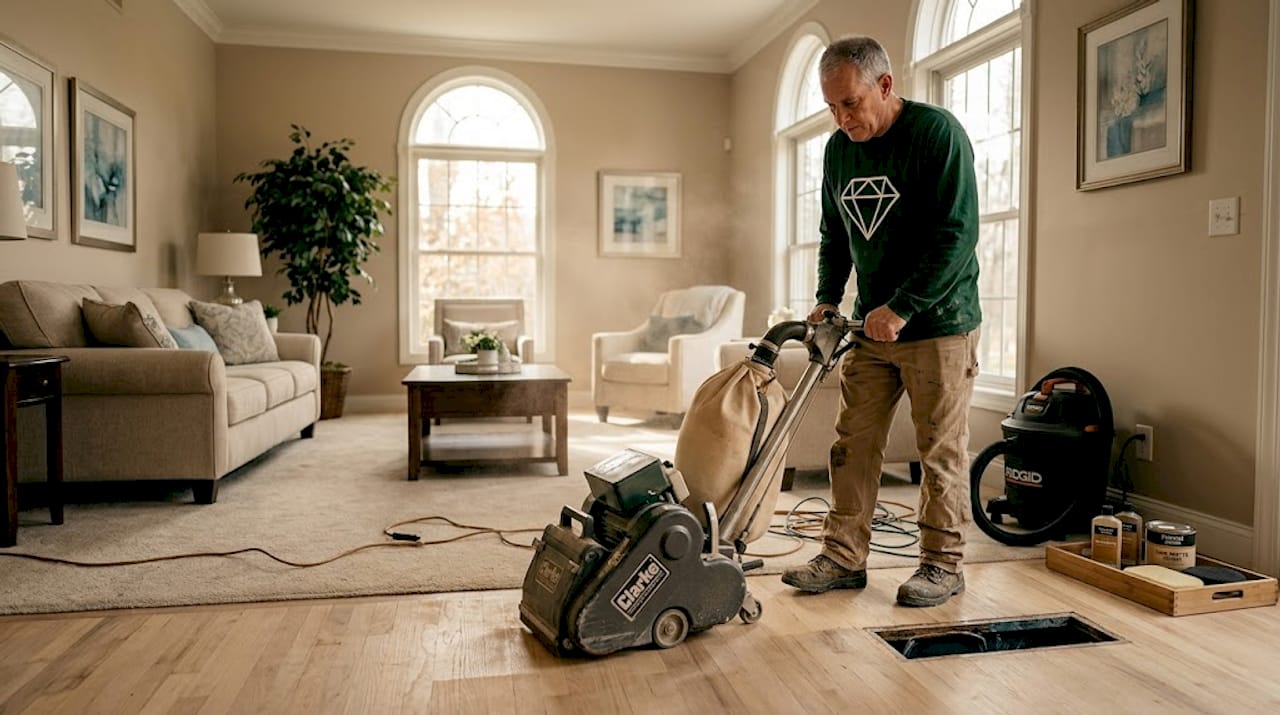
Coarse sanding. A drum or belt sander removes the old finish and a thin layer of wood. This is the most physically aggressive part of the process and the one most likely to go wrong in DIY attempts. An uneven pass leaves visible ridges called chatter marks, which are very difficult to correct later.
-
Edge sanding and detail work. A drum sander cannot reach corners, closets, or edges. An edge sander tackles these areas, and hand scraping or oscillating tools handle tight spots. Professionals spend significant time here because edges are where amateurs most often miss material.
-
Medium and fine sanding. Progressive grits smooth the surface and remove the scratches left by coarser paper. This staged approach, following industry standards for floor refinishing, is what gives a finished floor that glass-smooth feel underfoot.
-
Staining (optional but impactful). Stain changes or deepens the color of the wood. Not every homeowner wants to change their floor’s color, but stain can also correct uneven wood tones across different boards or species. The stain must be applied evenly and allowed to dry completely before any finish goes on top.
-
Sealing and finish coats. Most floors receive two to three coats of a protective finish, such as oil-modified polyurethane, water-based polyurethane, or a hard-wax oil. Each coat is lightly abraded before the next is applied to ensure adhesion. The final coat is left to cure undisturbed.
-
Curing and clean-up. Curing is not the same as drying. A floor can feel dry in 24 hours but may need several days to a week to reach full hardness. During this period, furniture should stay off and foot traffic should be minimal.
“The difference between a floor that lasts 15 years and one that starts peeling in 18 months often comes down to proper prep and allowing each coat to fully cure before adding the next.” — Polished JEMM Floor Care
This professional refinishing guide captures how home services professionals approach each stage with precision and why the sequence is non-negotiable.
Pro Tip: Never apply a second coat of finish over a tacky first coat. It traps solvent underneath, leading to soft spots and peeling within months. When in doubt, wait an extra hour.
Comparing refinishing to other flooring solutions
Understanding what refinishing involves leads many homeowners to wonder how it stacks up against other flooring update methods. Not every floor needs a full refinish, and not every floor can be saved by one either.
| Method | Best for | Approximate cost | Time needed |
|---|---|---|---|
| Full refinishing | Moderate to heavy wear, color change | $3 to $8 per sq ft | 3 to 5 days |
| Screen and recoat | Light surface wear, dull sheen | $1 to $2.50 per sq ft | 1 day |
| Replacement | Severe damage, warping, or rot | $8 to $15+ per sq ft | 5 to 10 days |
As refinishing details make clear, each method serves a specific situation. Here is a quick guide to help you match your floor’s condition to the right solution:
- Choose full refinishing when your floors show deep scratches, visible stains that cleaning cannot remove, significant color fading, or when you want a completely new look with a different stain color.
- Choose screen and recoat when the finish looks dull and worn but the wood itself has no deep damage. This method scuffs the existing finish to create adhesion and applies fresh topcoats without sanding down to bare wood.
- Choose replacement when boards are cupped (edges are higher than centers), severely warped, rotted, or when pet damage has penetrated deep into the wood. At that point, no amount of sanding fixes the structural issue.
One nuance many homeowners miss: the refinishing benefits of full refinishing go beyond aesthetics. Sealing bare wood protects it from moisture infiltration, reduces allergens trapped in micro-cracks, and can actually increase a home’s resale value. Real estate agents in New Jersey and Pennsylvania consistently report that refinished hardwood is a selling point that buyers notice immediately.
Timeline: How long does floor refinishing take?
Knowing which method to choose is important, but so is understanding the timing you will need to plan around. Refinishing is not a weekend project you can squeeze in between other activities. It takes over your living space for several days, and rushing the timeline is one of the most common causes of failed results.
Here is a realistic breakdown of timing for a standard 500 square foot area:
| Stage | Time required |
|---|---|
| Preparation and inspection | 2 to 4 hours |
| Sanding (coarse to fine) | 4 to 8 hours |
| Stain application and drying | 8 to 12 hours |
| First finish coat and dry time | 4 to 6 hours |
| Second finish coat and dry time | 4 to 6 hours |
| Final coat and cure period | 24 to 72 hours |
| Total | 3 to 5 days |
Several factors stretch or shrink this window considerably:
- Room size and layout. Larger rooms take longer to sand, especially those with hallways, closets, and transitions to adjacent rooms.
- Existing damage. Floors with board repairs, deep gouges, or old paint require extra prep time before sanding can even begin.
- Weather and humidity. High humidity dramatically slows drying and curing. Water-based finishes are especially sensitive to temperature and moisture. A rainy week in New Jersey can add a full day to your timeline.
- Number of finish coats. Premium results often require three coats instead of two, adding time between applications.
For homeowners comparing options, the one-day screen and recoat service is a strong alternative when the floor does not need full sanding. You can return to the space the same day and resume normal life much faster.
A thorough project timing guide can help you map out the logistics of your specific project before work begins. The turnkey approach described by Polished JEMM’s full-service process is worth reviewing if managing all the scheduling feels overwhelming.
Pro Tip: If you are planning around a holiday or event, finish at least 10 days before guests arrive. Cured floors can still show scuff marks from heavy furniture being dragged if the finish hasn’t fully hardened.
Common challenges and expert tips for a smooth refinishing job
With a timeline in mind, you will want to be prepared for the most common hurdles during professional or DIY refinishing. Even with the right equipment and materials, surprises happen. Knowing what they are ahead of time is the best protection against costly mistakes.
Dust control. Sanding generates enormous amounts of fine dust that travels through your HVAC system and settles on every surface in the home. Professional-grade equipment includes dust containment systems that capture most particles at the source. DIY renters rarely have access to this level of control. Sealing off vents and using air scrubbers helps, but premium turnkey services manage dust far more effectively than standard rental equipment.
Choosing the right finish. Not all finishes perform the same way in real life. Oil-modified polyurethane is extremely durable and gives wood a warm, amber tone that deepens over time. Water-based polyurethane dries faster, stays clearer, and has lower fumes, but may need more coats. Hard-wax oils penetrate the wood rather than sitting on top, creating a matte, natural look that is easy to spot-repair but requires more maintenance.
Humidity and temperature. New Jersey and Pennsylvania both experience significant seasonal humidity swings. Applying finish during a humid summer day without proper climate control means the finish dries too slowly, attracting airborne dust and potentially bubbling. Ideal conditions are between 60°F and 80°F with relative humidity below 55%.
Uneven stain absorption. Wood absorbs stain differently depending on grain direction, board species, and even how recently the floor was last sanded. A pre-conditioner applied before stain can even out absorption on soft woods like pine, preventing a blotchy appearance that is extremely difficult to correct after the fact.
Lap marks in the finish. These appear when a section of finish begins to dry before the next area is applied, leaving a visible ridge where the two sections meet. Working quickly, applying thin coats, and using a quality applicator pad dramatically reduces this risk.
Here are key tips from our floor care tips that apply whether you are supervising a pro or doing the work yourself:
- Always sand with the grain, never against it or diagonally.
- Test your stain on a hidden section of floor before committing to the entire room.
- Keep pets and children out of the work area during sanding and finish application.
- Use fans directed outward, not inward, to exhaust fumes without bringing in outdoor dust.
- Never use a damp mop on a freshly refinished floor for at least two weeks.
Why the right refinishing process matters more than you think
Here is something most guides won’t tell you directly: the biggest mistakes in floor refinishing are not technical errors. They are decisions made before the first piece of furniture is moved.
We have seen homeowners choose a contractor based on price alone, only to discover the crew skipped the fine-sanding stage and went straight to finish over coarse scratches. We have also seen the opposite: homeowners who invested in proper prep and quality finish and are still calling us 12 years later just for a maintenance recoat. The floor looks as good as the day we finished it.
Shortcuts in surface preparation are especially insidious because they are invisible at first. A floor sealed over inadequate sanding looks fine for six to twelve months. Then the finish starts to peel in high-traffic areas. By the time the problem becomes visible, the only fix is to start the entire process over again. You pay twice.
Minor investments in preparation, like board repairs before sanding, proper dust management, and a pre-conditioner before staining, extend the life of the finished floor by years. We are not talking about luxury add-ons. We are talking about fundamentals that separate a floor that looks good in photos from one that holds up through a decade of real family life.
Experience also matters in ways that are hard to quantify. A seasoned refinisher reads a floor the way a doctor reads a patient. They notice the subtle cup in a board that will telegraph through the finish. They recognize the old wax contamination that will prevent proper adhesion. They adjust their approach based on what the wood tells them. That judgment is not something you acquire from watching a tutorial.
If you want to understand what a truly thorough approach looks like from start to finish, the turnkey refinishing insights from Polished JEMM show how every stage connects and why cutting any one of them short undermines the whole investment.
Get expert help with your hardwood floor refinishing
You now understand the full scope of what refinishing actually involves. The steps, the timing, the pitfalls, and the difference between a floor that lasts and one that fails within a year. That knowledge is genuinely useful, and it will help you ask the right questions and make better decisions for your home.
At Polished JEMM Floor Care, we have been refinishing hardwood floors across New Jersey and Pennsylvania since 2014. We use eco-friendly products, professional dust containment, and a meticulous approach that covers every inch of your floor, not just the parts that are easy to reach. Whether you need a full hardwood floor refinishing or want to explore your options, our step-by-step refinishing guide is a great place to start. For detailed refinishing information tailored to your floor’s specific condition, reach out to our team and let’s talk about what your floors need to look their absolute best.
Frequently asked questions
Can I stay home during the refinishing process?
It is best to vacate during refinishing, especially during sanding and curing, because of significant dust and finish fumes that are both disruptive and potentially harmful with extended exposure.
How often should hardwood floors be refinished?
Most floors need refinishing every 7 to 10 years, though heavy foot traffic, pets, and inadequate maintenance can shorten that window to 5 years in some cases.
Is sanding always required during refinishing?
Full refinishing always requires sanding down to bare or near-bare wood, but a screen and recoat skips heavy sanding for floors that only show light surface wear.
What affects the cost of refinishing hardwood floors?
Cost depends on floor size, the number of damaged boards that need repair, your stain and finish choices, and current labor rates in your area of New Jersey or Pennsylvania.
How do I choose between refinishing and replacing my floors?
Refinish if the wood is structurally sound with no warping or rot; replacement benefits outweigh refinishing when damage is severe, boards are cupped or water-stained throughout, or the floor is too thin from previous sandings.