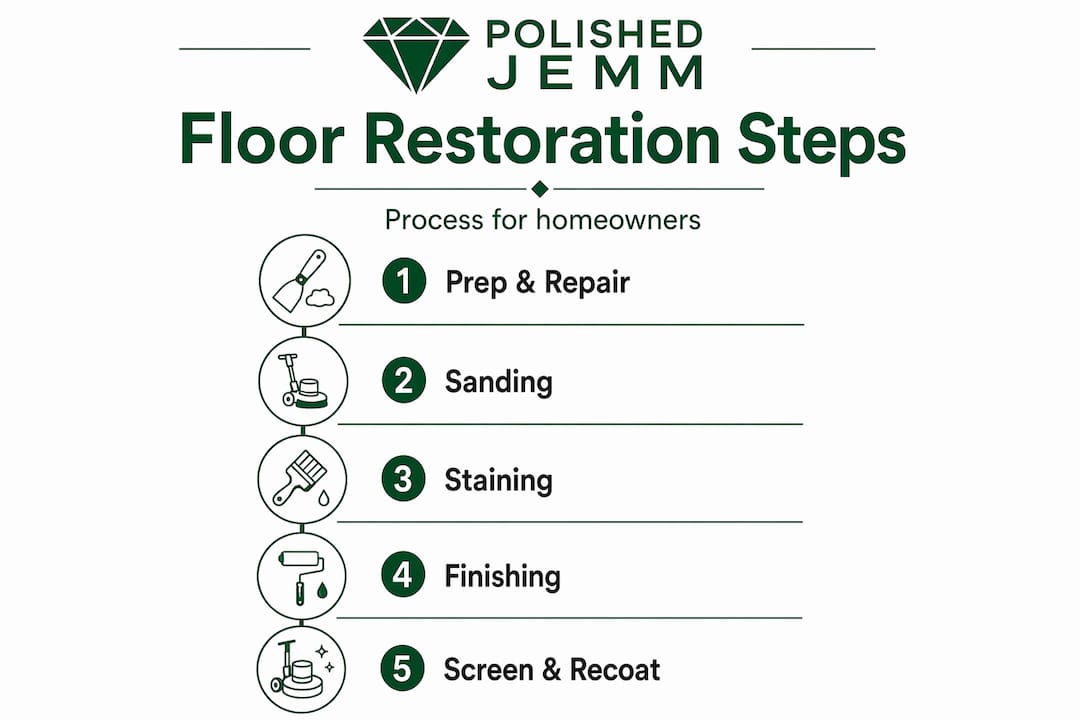
Hardwood floors are one of the most durable investments in your home, but a lot of homeowners assume that restoring them requires weeks of disruption, mountains of dust, and a contractor who speaks a language you don’t understand. That assumption keeps people from acting, and worn floors get worse while perfectly good wood sits underneath. The floor restoration process explained here is not a mystery. It follows a logical sequence that you can understand, plan around, and use to have confident conversations with professionals. Read through this guide and you will know every step before anyone sets foot in your home.
Table of Contents
- Key takeaways
- The floor restoration process explained: where it starts
- Sanding: the heart of the floor repair process
- Staining: personalizing your floor’s color
- Finishing: locking in the protection
- Screen and recoat: the smart refresh option
- My honest take on what homeowners get wrong
- Ready to restore your floors the right way?
- FAQ
Key takeaways
| Point | Details |
|---|---|
| Prep work determines results | Clearing furniture, fixing nails, and sealing doorways protects your home and sets up a clean sanding job. |
| Sanding follows a grit sequence | Three passes with progressively finer grits remove old finish and level the wood surface correctly. |
| Staining is optional but powerful | A test patch before committing to a color saves you from a staining decision you will regret. |
| Curing takes longer than drying | Finish feels dry in 24 hours but needs up to 30 days to fully cure before heavy furniture goes back. |
| Screen and recoat is a smart middle option | Minor wear and dull finish can be refreshed in one day without sanding down to bare wood. |
The floor restoration process explained: where it starts
Before any sanding machine enters your home, the preparation phase does the heavy lifting. Skipping or rushing it is the single most common reason floor restoration jobs go wrong.
Start by clearing every piece of furniture, every rug, and every piece of wall decor from the room. This is not just about access. Sanding generates fine dust that travels farther than you expect and settles on everything. You will also need to remove shoe molding and quarter-round trim along the baseboards. The baseboard itself stays. The quarter-round comes off carefully so it can be reinstalled once the finish is dry.
With the floor exposed, walk every inch of it and look for protruding nails, loose boards, squeaky sections, and any boards with visible damage. Address each one before sanding begins. Loose boards need to be secured. Damaged planks need repair or replacement. And nails hammered below the wood surface protect your rented drum sander from catastrophic damage.
Pro Tip: Mix fine sanding dust from your first pass with wood filler to create a custom-colored filler that matches your floor far better than anything you’ll find at a hardware store. Custom-colored fillers work especially well for filling large gaps between boards.
Finally, seal all doorways with plastic sheeting before sanding begins. Tape the sheeting to the door frame on all sides. If you are not using dustless equipment, this step contains the dust to the work area and makes cleanup dramatically easier.
Here is a quick checklist for the preparation phase:
- Remove all furniture, rugs, and wall decorations from the room
- Take off shoe molding and quarter-round trim along baseboards
- Inspect and repair loose or damaged boards
- Set all nail and screw heads below the floor surface
- Seal doorways with plastic sheeting to contain dust
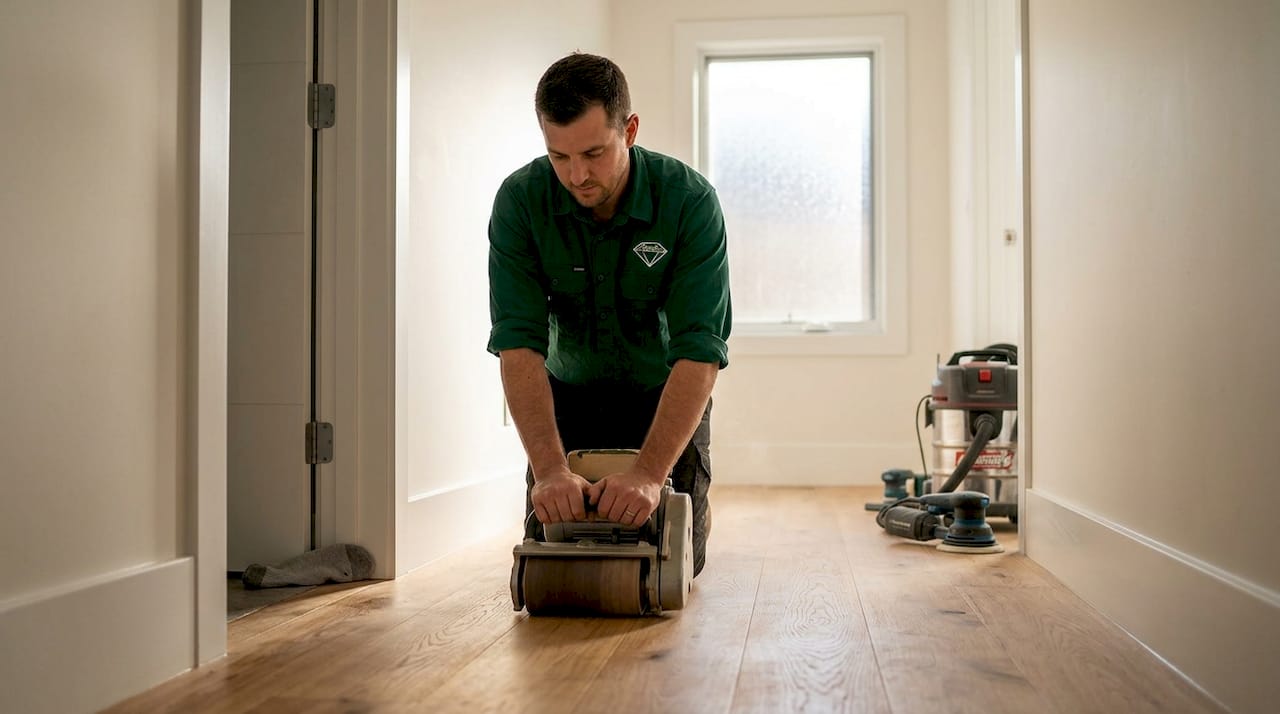
Sanding: the heart of the floor repair process
Sanding is where the transformation actually happens, and understanding the grit sequence takes away the guesswork entirely.
Professional floor restoration uses a three-pass sanding sequence: a first pass with 36 to 60 grit, a second pass with 80 grit, and a final pass with 100 to 120 grit. Each pass removes a layer of old finish, scratches from the previous pass, and uneven wood. You work from the coarsest grit to the finest, which means each pass smooths out what the previous one left behind.
The main field of the floor gets sanded with a drum sander or a large orbital sander. But the drum sander cannot reach the edges along the walls. That is where an edge sander comes in, working in the same grit progression as the main floor. After the edges, you still have corners where neither machine fits. Hand sanding or an oscillating detail tool handles those tight spots, including closets and areas behind doors.
| Grit level | Purpose | Tool used |
|---|---|---|
| 36-60 grit | Strip old finish and level the wood | Drum or orbital sander |
| 80 grit | Remove scratches from first pass | Drum or orbital sander |
| 100-120 grit | Final smoothing before finish | Drum, orbital, or hand sanding |
| 120-150 grit | Edges and detail areas | Edge sander or hand sanding |
Between every pass, vacuum the entire floor thoroughly and follow up with a tack cloth. Dust left on the surface gets trapped in the next sanding pass and creates micro-scratches. It also contaminates the finish coats if it carries through to that stage.
The most costly mistake in this phase is sanding against the wood grain. Sanding against the grain creates visible scratches that no amount of finishing will hide. Always move the sander parallel to the direction of the wood planks.
Pro Tip: Rental equipment for an average-sized room typically requires about one full day of work. Schedule your rental pickup the morning of the job so you have a full day with the equipment without paying for overnight time you won’t use.
Staining: personalizing your floor’s color
Staining is completely optional. If you love the natural color of your wood, you can skip straight to the finish coats. But if you want a richer tone, a darker shade, or a color that ties the room together, staining gives you that control.
Before applying any stain, consider the wood species you are working with. Softer woods like pine absorb stain unevenly, which creates blotchy, inconsistent color. Applying a wood conditioner before staining solves this. It partially seals the wood surface so the stain absorbs at a consistent rate across the entire floor.
When you are ready to apply stain, you have three application methods to choose from:
- Brush: Good for small areas and detailed work near edges
- Roller: Faster coverage for large open areas
- Pad applicator: Smooth, even application with good control on the main floor
Regardless of the method, apply stain in sections and wipe off the excess based on the manufacturer’s instructions. The longer you leave stain on before wiping, the deeper the color. This is how you fine-tune the final tone.
Drying time between stain coats runs from 6 to 24 hours depending on the product and the humidity in your home. If you want a deeper color, apply a second coat only after the first is completely dry. And before committing to any color on the full floor, apply a test patch in a closet or a low-visibility corner. Color looks different on your actual floor than it does on a sample chip.
Finishing: locking in the protection
The finish coat is what protects your newly restored wood from daily wear. Choosing the right finish and applying it correctly determines how long your floors look great before the next refinishing cycle.
The three most common finish options each have different performance profiles:
| Finish type | Durability | Dry time | Best for |
|---|---|---|---|
| Oil-based polyurethane | Very high | 24 hours between coats | High-traffic areas, traditional look |
| Water-based polyurethane | High | 2-4 hours between coats | Lighter color, low odor, faster return |
| Hardwax oil | Moderate | 12-24 hours | Natural look, spot-repairable |
Apply finish with a lambswool applicator or a T-bar applicator in long, smooth strokes that follow the direction of the wood grain. Avoid going back over wet finish, as this creates streaks and bubbles. Most floors need at least two coats. High-traffic areas like hallways and kitchens benefit from a third coat. Between coats, lightly screen the surface with 220 grit paper or a screening pad, then vacuum and tack before the next application.
Modern finishes increasingly use low-VOC or VOC-free sealants that protect both your floors and the air quality inside your home. This matters especially in homes with young children or anyone sensitive to chemical odors.
Drying and curing are two different things. The finish feels dry and ready for light foot traffic after about 24 hours. But full cure takes 7 to 14 days before furniture should go back on the floor, and up to 30 days for a complete cure that protects against scratches and indentations from heavy items.
Pro Tip: Place felt pads on all furniture legs before moving anything back onto the freshly finished floor. Even after the 14-day wait, the finish is still completing its cure. Felt pads protect it during that final hardening period.
Screen and recoat: the smart refresh option
Not every floor needs a full sand and refinish. If your floors are structurally sound and showing only surface wear, a screen and recoat is worth serious consideration.
The screen and recoat process abrades the existing finish with a 120 to 150 grit screen, then applies a fresh coat of polyurethane over it. You are not sanding down to bare wood. You are scuffing the existing finish just enough for the new coat to bond to it.
Here is when a screen and recoat is the right call:
- The finish looks dull or worn but has no deep scratches through to the wood
- You want to refresh the floor’s appearance without the cost of full refinishing
- You need a quick turnaround, often completing the work in a single day
- The existing color is fine and you do not want to change it
What it cannot do is equally important to understand. Screen and recoat will not fix deep scratches, water stains, or dark spots. It will not change the stain color. If the finish has worn through in multiple spots and bare wood is exposed, you need a full refinish.
The maintenance cycle for floors maintained with regular screen and recoats typically runs every 3 to 5 years. Polishedjemmfloor’s one-day screen and recoat service is a popular option for homeowners who want professional results without the multi-day process of a full restoration.
Pro Tip: Daily dry mopping in entry areas and high-traffic zones keeps grit off your finish. Grit acts like sandpaper underfoot and shortens the time between necessary recoats.
My honest take on what homeowners get wrong
I’ve seen hundreds of floor restoration projects, and the pattern that causes the most problems is impatience. Not with the sanding, not with the prep. With the curing time.
Homeowners move furniture back after 24 hours because the floor looks done. It feels dry. It shines. But the finish has not hardened. I’ve seen beautiful restoration jobs develop permanent indentations from chair legs within the first week because someone didn’t wait the full 7 to 14 days before placing furniture. That mistake means doing the job again.
The second thing I’ve learned is that refinishing conserves natural resources in a meaningful way. Choosing to restore rather than replace is genuinely better for the environment. It reduces landfill waste and avoids the manufacturing impact of new flooring. That’s a real advantage beyond just cost savings.
What I tell every homeowner dealing with engineered hardwood floors specifically: get a professional to evaluate the veneer thickness before committing to a full sand. Some engineered floors have a top layer so thin they can only tolerate one refinishing cycle before the veneer is compromised. Knowing that before you start saves you from damaging what you were trying to save.
The hardwood floor refinishing benefits extend far beyond aesthetics. Regular maintenance and timely refinishing genuinely extend the structural life of your floors by decades.
— Jim
Ready to restore your floors the right way?
Now that you understand every phase of the restoration process, you can see exactly what the work involves and what separates a great outcome from a frustrating one. Polishedjemmfloor has handled every step of this process for homeowners across the tri-state area since 2014.
Their team covers everything: furniture moving, dust containment, sanding, staining, and multiple finish coats using eco-friendly products. Whether you need a full refinish or a one-day screen and recoat, they bring the equipment and expertise to do it without turning your home upside down. Explore your options with a complete hardwood floor refinishing guide or schedule a professional assessment through their refinishing services page to get started.
FAQ
What are the main floor restoration steps in order?
The floor restoration steps follow this sequence: preparation and repairs, sanding with progressive grits, optional staining, and applying multiple finish coats. Each phase builds directly on the one before it.
How long does the full floor repair process take?
A full sand and refinish typically takes 2 to 3 days of active work, plus 7 to 14 days of curing time before furniture returns. High-traffic areas may need up to 30 days for complete cure.
What is the difference between refinishing and screen and recoat?
Full refinishing sands the floor down to bare wood and rebuilds the entire finish from scratch. Screen and recoat only abrades the existing finish surface and adds a fresh topcoat, making it faster and less expensive for floors with light wear.
Can all hardwood floors go through the same restoration techniques?
Solid hardwood floors can typically handle multiple full refinishing cycles. Engineered hardwood floors may have thin veneers that limit how many times they can be sanded, so professional evaluation before starting the floor repair process is recommended.
How do you maintain floors after restoration to extend the finish life?
Daily dry mopping removes grit that wears down the finish, especially near entrances. Regular cleaning and protective felt pads under furniture legs significantly extend the time between refinishing cycles.