Hardwood floor wax removal is the process of safely stripping excess or old wax buildup from wood floors to restore their original finish and prepare the surface for proper care or refinishing. Most homeowners discover the problem too late: years of applying paste wax or wax-based polishes leave a cloudy, sticky film that no amount of mopping will fix. The right tools for this job include mineral spirits, plastic scrapers, 0000-grade steel wool, and microfiber cloths. Getting the process right protects your floor’s finish, prevents permanent scratching, and gives you a clean slate for long-term hardwood floor maintenance.
How to identify wax buildup on your hardwood floors
Wax buildup shows up in three distinct ways: a dull or hazy appearance that doesn’t respond to cleaning, a sticky or tacky feel underfoot, and a cloudy film that seems to sit on top of the wood rather than inside it. These symptoms appear gradually, which is why many homeowners mistake buildup for a dirty floor and keep applying more product, making the problem worse.
The most reliable diagnostic tool costs nothing. Pour a few drops of water onto the floor in an inconspicuous spot. If the water beads up and sits on the surface, your floor has a wax or oil finish. If the water soaks in quickly or leaves a white mark, the finish is compromised. If the water sits flat and the surface looks glossy underneath, you likely have a polyurethane finish with no wax present.
Knowing your finish type before you start is not optional. Spot testing solvents on a hidden area, such as inside a closet or behind a door, confirms whether your chosen remover will dissolve the wax without damaging the underlying finish. This single step prevents the most common and costly DIY mistakes.
- Dull, hazy appearance that persists after cleaning indicates wax film accumulation
- Sticky or tacky surface suggests wax has softened and trapped dirt
- Cloudy patches in high-traffic areas point to uneven wax layering
- Water beading on the surface confirms a wax or oil finish rather than polyurethane
- Yellowing or discoloration in older floors often signals decades of wax oxidation
What tools and materials do you need for wax removal?
The right supplies make the difference between a clean result and a damaged floor. Every item on this list serves a specific purpose, and substituting with cheaper or harsher alternatives is where floors get ruined.
| Tool or Material | Purpose |
|---|---|
| Odorless mineral spirits | Dissolves wax buildup without harming wood when used with proper ventilation |
| Plastic scraper or old credit card | Lifts thick wax deposits without scratching the surface |
| 0000-grade steel wool | Gently buffs away thin wax films after solvent application |
| Microfiber cloths | Absorbs dissolved wax and applies cleaners without leaving lint |
| pH-neutral hardwood floor cleaner | Removes solvent residue and protects finish after wax stripping |
| Nitrile gloves, safety glasses, mask | Protects skin, eyes, and lungs from solvent fumes |
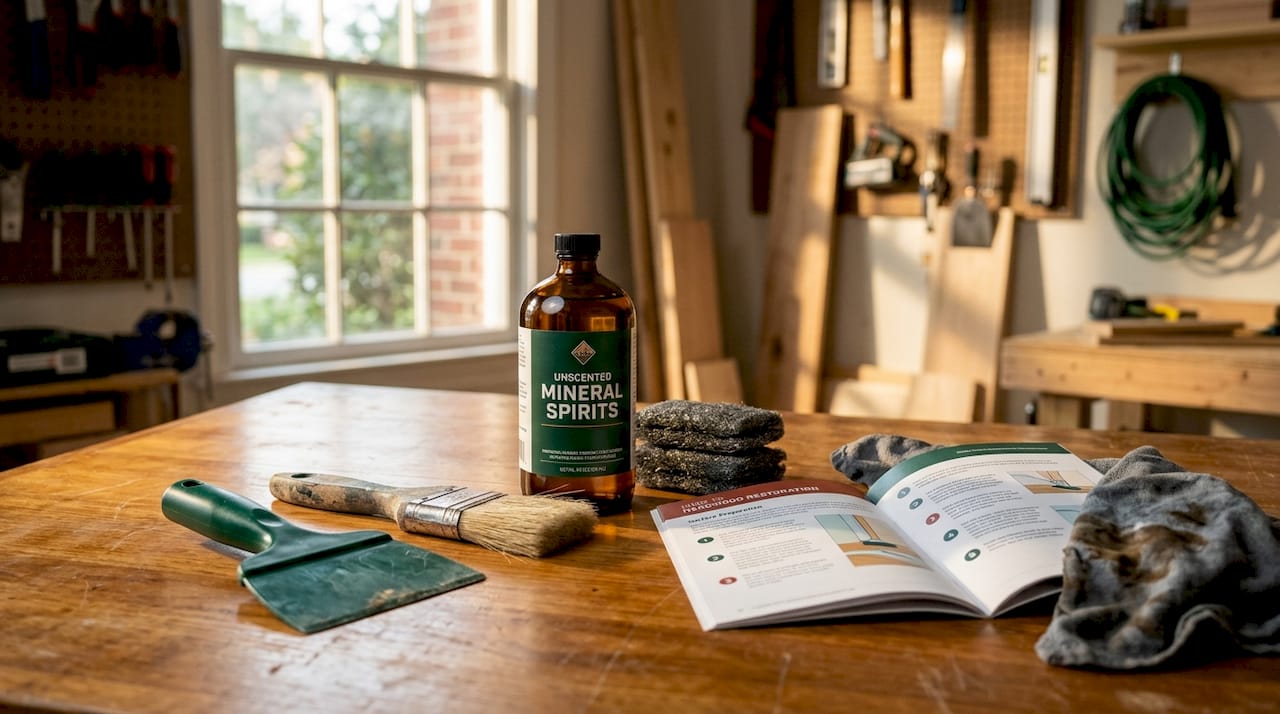
Odorless mineral spirits dissolve old wax effectively, but they require open windows, a fan, and nitrile gloves at minimum. The fumes from mineral spirits accumulate fast in enclosed rooms, and skin contact causes irritation with repeated exposure. Proper ventilation and eye protection are non-negotiable when working with any solvent on interior floors.
Commercial wax removers such as Holloway House Quick Shine Floor Finish Remover or Bruce Hardwood and Laminate Floor Cleaner are formulated specifically for wood surfaces and carry less risk than general-purpose solvents. They cost more per application but reduce the guesswork around dilution and finish compatibility.
Pro Tip: Never use steel wool higher than 0000 grade on hardwood. Coarser grades leave micro-scratches that catch light and become visible after refinishing.
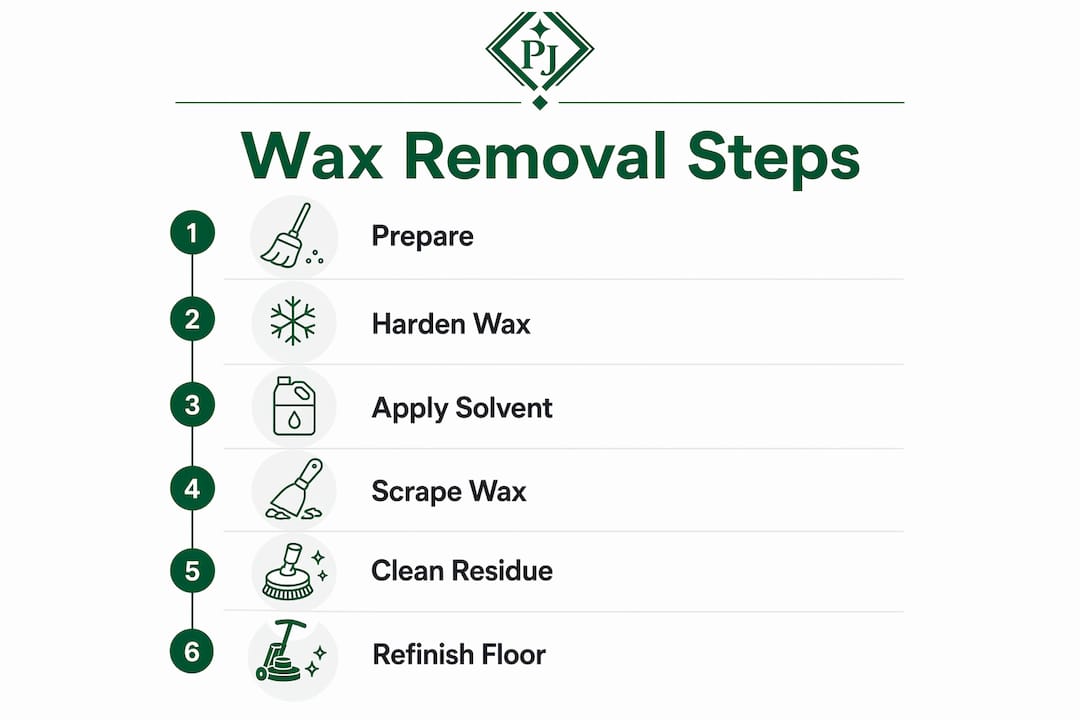
Step-by-step guide to removing wax from hardwood floors
This sequence follows the correct order for DIY hardwood floor wax removal. Skipping steps or reversing the order is the primary reason homeowners damage their floors mid-project.
-
Clear and sweep the area. Remove all furniture, rugs, and debris. Sweep or vacuum thoroughly so no grit gets dragged across the floor during the removal process.
-
Let thick wax harden fully. If you have fresh wax deposits or drips, allow them to cool and harden completely before touching them. Cold, hardened wax becomes brittle and lifts cleanly from the surface. Trying to remove soft wax pushes it deeper into the wood grain and increases the amount of solvent you need later.
-
Scrape thick deposits with a plastic edge. Use a plastic scraper or the edge of an old credit card held at a low angle. Work slowly and with light pressure. Avoid metal scrapers or razor blades entirely. Metal tools slip and gouge the wood, leaving permanent scratches that no amount of cleaning will fix.
-
Apply low heat to thin wax films. For thin, stubborn wax layers that won’t scrape off, set a hair dryer to its lowest heat setting and hold it six inches above the surface. Place a soft cloth or a sheet of brown paper over the wax and move the dryer slowly across it. Low heat softens thin wax layers so the cloth or paper absorbs them without aggressive scraping. Never hold heat in one spot for more than a few seconds.
-
Apply mineral spirits or commercial remover in small sections. Dampen a clean microfiber cloth with odorless mineral spirits. Work in two-foot sections, rubbing gently in the direction of the wood grain. Let the solvent sit for 30 to 60 seconds to dissolve the wax, then wipe away with a clean section of cloth. Do not pour solvent directly onto the floor.
-
Buff with 0000-grade steel wool where needed. After the solvent application, if a hazy residue remains, gently buff the area with 0000-grade steel wool using circular motions. Apply minimal pressure. This step works only on floors where you have confirmed the finish can tolerate it through spot testing.
-
Clean with a pH-neutral hardwood cleaner. Once the wax is removed, clean with a pH-neutral cleaner applied to a damp microfiber cloth. This removes solvent residue and restores the floor’s surface without raising wood fibers or dulling the finish. The cloth should be damp, not wet.
-
Dry the floor thoroughly. Wipe the entire section dry with a clean, dry microfiber cloth. Allow the floor to air dry for at least 30 minutes before walking on it or replacing furniture.
-
Repeat as needed. Heavy buildup from years of waxing rarely comes off in one pass. Repeat steps five through eight in the same section until the floor looks clear and consistent.
Pro Tip: Work in natural light or use a portable work light held at a low angle to the floor. Raking light reveals hazy patches and missed spots that overhead lighting completely hides.
Common mistakes that damage floors during wax removal
The most destructive errors in this process share one trait: impatience. Homeowners who rush the job reach for harsher tools and chemicals, and the floor pays the price.
- Using metal scrapers or razor blades creates permanent gouges. Metal tools risk irreparable damage with a single slip, and no finish can hide deep scratches.
- Oversaturating the floor with water or solvent causes wood fibers to swell, warping boards and lifting the finish. A damp cloth is always the correct application method.
- Using bleach, ammonia, or vinegar-heavy solutions strips finish and discolors wood. Harsh chemicals damage hardwood finishes and cause swelling that is expensive to repair.
- Steam mopping during or after removal forces moisture directly into wood grain and seams, causing long-term structural damage.
- Scrubbing aggressively with any abrasive pad dulls the finish and creates uneven sheen across the floor.
When buildup covers more than one room, or when the floor shows signs of finish failure such as peeling, deep discoloration, or soft spots, stop the DIY process. At that scale, professional stripping and refinishing produces a better result at lower total risk to the floor.
Stubborn spots that resist mineral spirits often respond to a second application left on for two full minutes before wiping. If a spot still won’t clear after three attempts, the issue may be finish damage rather than wax buildup, and continuing to scrub will only make it worse. Check the hardwood floor maintenance tips at Polishedjemmfloor for guidance on distinguishing wax buildup from finish failure.
Post-removal care to prevent future wax buildup
Removing the wax is only half the job. What you do next determines how long your floors stay clean and whether the problem comes back.
- Switch to a pH-neutral hardwood floor cleaner such as Bona Hardwood Floor Cleaner or Method Squirt and Mop for routine cleaning. These products clean without leaving residue.
- Avoid wax-based polishes on polyurethane-finished floors entirely. Wax on polyurethane finishes creates sticky buildup that prevents proper recoating and is difficult to remove. If your floor has a polyurethane finish, it does not need wax.
- Buff the floor dry after every wet cleaning. Standing moisture is the number one cause of finish degradation between refinishing cycles.
- For true wax finishes, apply a fresh coat of paste wax no more than once or twice per year. More frequent application is the direct cause of the buildup you just removed.
- Schedule a professional screen and recoat every three to five years for polyurethane floors to refresh the finish without full sanding. This is far less disruptive and less expensive than a full refinish.
- Know when to refinish. Once wax is stripped, complete wax removal is necessary before any new finish bonds properly. If the floor looks uneven or dull after removal, a full refinish restores the surface to its original condition.
Protecting your floors long-term also means addressing the source of the problem. Review the 10 proven ways to protect hardwood floors to build a maintenance routine that keeps buildup from returning.
Key takeaways
Effective hardwood floor wax removal requires hardening wax before scraping, using mineral spirits with proper safety precautions, and finishing with a pH-neutral cleaner to protect the surface.
| Point | Details |
|---|---|
| Harden wax before scraping | Cold, brittle wax lifts cleanly and reduces the solvent needed for removal. |
| Use plastic, not metal tools | Metal scrapers cause permanent scratches; a credit card edge is safer and effective. |
| Mineral spirits dissolve buildup | Apply with a microfiber cloth in small sections, always with ventilation and gloves. |
| pH-neutral cleaner is the final step | It removes solvent residue without raising wood fibers or dulling the finish. |
| Wax does not belong on polyurethane | Applying wax to modern finishes creates buildup that blocks recoating and causes haze. |
What years of floor work taught me about wax removal
I’ve seen homeowners spend an entire weekend on a floor that a professional could have stripped in two hours, and I’ve seen the opposite: a homeowner who followed the right sequence and got a result that genuinely impressed me. The difference is almost never about effort. It’s about sequence and patience.
The mistake I see most often is treating wax removal like a cleaning task rather than a restoration task. People grab a mop, pour on a cleaner, and scrub harder when it doesn’t work. Wax doesn’t respond to cleaning products. It responds to the right solvent, applied correctly, in the right order. When you skip the hardening step or reach for a metal scraper because the plastic one feels slow, you’re trading a recoverable problem for a permanent one.
The other thing I’d push back on is the idea that every floor needs wax. The vast majority of hardwood floors installed in the last 30 years have polyurethane finishes. Those floors never needed wax in the first place. The buildup I see on them almost always traces back to a well-intentioned homeowner who applied a “shine” product that contained wax. If you’re not certain what finish your floor has, treat it as polyurethane until you confirm otherwise.
My honest recommendation: if the buildup covers more than two rooms, or if you see any signs of finish damage underneath, call a professional before you start. The cost of a professional strip and refinish is almost always less than the cost of repairing a floor that was damaged during a DIY attempt. For everything else, the process in this article works. Take your time, work in sections, and let the solvent do the heavy lifting.
— Jim
Ready to restore your floors after wax removal?
Once the wax is gone, your floor is ready for its best finish yet. Whether you need a light refresh or a full restoration, Polishedjemmfloor has been transforming hardwood floors across the tri-state area since 2014.
Polishedjemmfloor specializes in hardwood floor refinishing services that address everything from surface prep after wax stripping to complete floor restoration. Their team uses eco-friendly products and professional-grade equipment to deliver results that last. If you’re weighing your options after a wax removal project, the hardwood floor refinishing guide at Polishedjemmfloor walks you through exactly what the process looks like and what to expect. For floors that need a faster turnaround, their one-day screen and recoat service refreshes the finish without the disruption of a full sand-down.
FAQ
What is the best solvent for removing wax from hardwood floors?
Odorless mineral spirits are the most effective and widely available solvent for dissolving wax buildup on hardwood floors. Apply with a microfiber cloth in small sections, always with gloves and open windows for ventilation.
How do I know if my floor has wax or polyurethane finish?
Drop a few beads of water on the floor in a hidden spot. If the water beads up and sits on the surface, the floor has a wax or oil finish. If the surface looks glossy and the water spreads flat, it is likely polyurethane.
Can I use vinegar to remove wax from hardwood floors?
Vinegar is not recommended for wax removal on hardwood floors. Its acidity can strip finish, dull the surface, and cause long-term damage to the wood. Use mineral spirits or a commercial hardwood wax remover instead.
How often should I wax hardwood floors?
True wax finishes benefit from a fresh coat of paste wax once or twice per year at most. Polyurethane-finished floors should never be waxed, as wax creates buildup that prevents proper recoating and causes a hazy appearance.
When should I call a professional for wax removal?
Call a professional when buildup covers multiple rooms, when the floor shows signs of finish failure such as peeling or deep discoloration, or when DIY attempts have left uneven results. Professional stripping and refinishing restores the floor without the risk of further damage.